
🚀 Don't Miss This Important Resource!
Explore Our Advance Xcel Tools Free !One of the most typical things that students, office workers, accountants, and business owners do is change an Excel file to a PDF. Saving your Excel sheet as a PDF makes sure that the formatting stays the same and that it can’t be readily changed. This is true whether you are sharing reports, invoices, dashboards, or financial statements.
💡 Ready to test your Excel knowledge?
This tutorial will show you how to quickly and easily save an Excel file as a PDF. And make sure that your data is secure and private.
Here are the methods to Convert Excel to PDF
Method 1: Save active sheet as PDF
It’s easy to save an active Excel sheet as a PDF, and we’ll show you how.
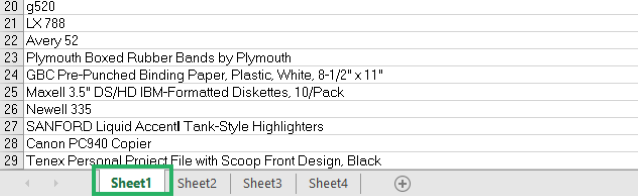
Let’s say we have some test data on a sheet 📑
We only want to save the active sheet as a PDF, not the whole workbook.
Step 1: Select the active sheet by clicking on it.
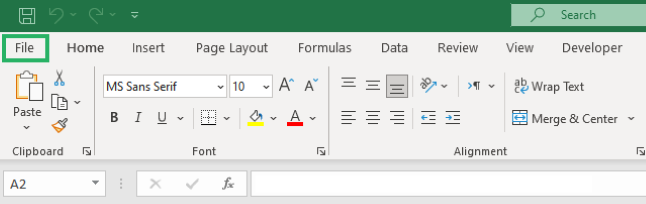
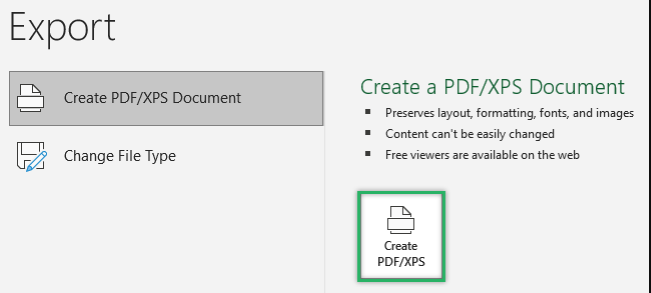
Step 2: Go to the File Tab.
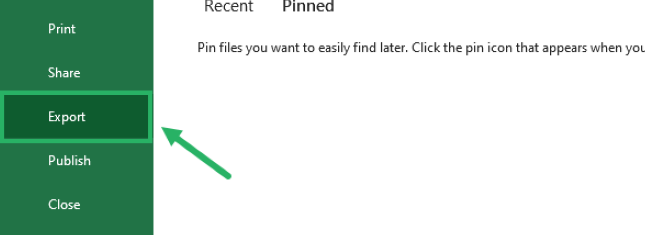
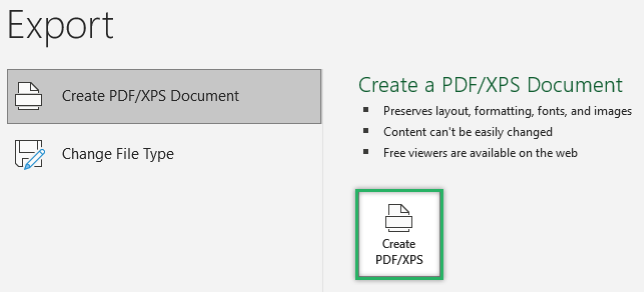
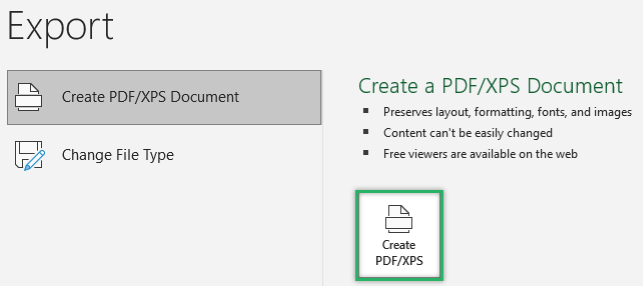
Step 3: After that, select Export
Step 4: Now click Create PDF/XPS.
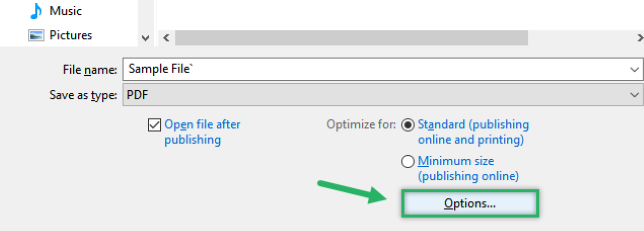
Step 5: The dialog box for “Publish As PDF or XPS” pops up.
Step 6: There are two options for optimization under the “Save as type” menu. You can choose between the standard size and the smallest size.
Step 7: Under Optimize for, click the Options button.
Step 8: You will see an Options dialog box.
Step 9: Under the Publish what section, choose Active Sheets.
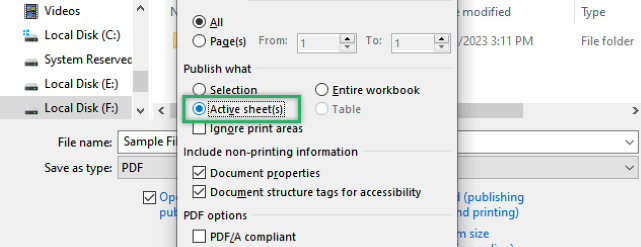
Step 9: Press OK. Then click publish
Now your Excel file is saved as a PDF file!
ALSO READ: How to Use PivotTables in Excel: A Beginner-Friendly Guide
Method 2: Save selected sheets as PDF
You can also save certain sheets as a PDF in the same way as above.
Step 1: Choose the sheets from the Sheet Tab.
To select all the sheets, click on the first sheet, hold down the Shift key, and then click on the last sheet. To choose sheets that aren’t next to each other, hold down the CTRL key and click the sheets you want to choose.
Step 2: Go to File Tab > Export > Create PDF/XPS.
Step 3: The dialog box will show up, Choose Options, Under the “Publish what” option, choose “Selection.”

Step 4: Press OK, then Publish.
After clicking on publish, your selected sheet will be converted into PDF.
Method 3: Save entire file as PDF
Finally, let’s turn a whole Excel workbook into a PDF file. The steps are the same as what you see above.
Follow these steps to convert the entire file as a PDF.
Step 1: Go to File tab > Export > Create PDF/XPS.
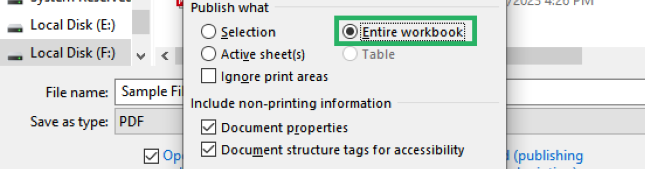
Step 2: The dialog box will show up. Under “Save as type,” click Options.

Step 3: Under “Publish what,” choose “Select Entire Workbook.”
Step 4: Press Ok > Publish.
The whole workbook will be turned into a PDF file right away.
Final Thought
We learned how to change an Excel file into a PDF in this article. We learned how to save only certain sheets or the whole file as a PDF.
Both jobs are simple and only take a few seconds. You should be able to do it well after practicing it a few times.
💡 Ready to test your Excel knowledge?