
🚀 Don't Miss This Important Resource!
Explore Our Advance Xcel Tools Free !You may have heard of an Expense Manager or an Expense Tracker, and both are basically apps that will help you to record the money going in & coming out. This is a tool to control your day-to-day consumption and find out how much you spend and on what.
💡 Ready to test your Excel knowledge?
Seeing Your Money and Savings Goals Microsoft ExcelOh, one of the easiest and ubiquitous tool to try out this exercise. These are just a few of the many options that Excel offers to create your own expense tracker, but can actually make it easier by keeping things simple and adjustable to how you might use them. In this post, we would provide you a step-by-step guide on how to create an expense tracker in Excel
What is an Excel expense tracker?
An Excel expense tracker is a digital tool used to track and manage expenses in Microsoft Excel. You’re probably familiar with it as a “spreadsheet,” in which users enter various expenses into predefined categories to efficiently track their financial management.
Why excel for expense tracking?
Excel is a common and simple tool to use Basicalistically, it is rows and columns, but also includes the likes of formulas, charts, etc. It is also highly customizable so that you can easily make your tracker reflect the way in which expenses are incurred, on a daily or weekly level. And not to mention, with Excel, you can work on your tracker anytime, anywhere because it does not require any specialized software.
ALSO READ: How to Create a qbj File From Excel
Here is Step-by-Step Guide to Creating an Expense Tracker in Excel
Step 1: Open a New Excel workbook
The first step is to open Excel and add a new workbook. You could give it a simple name, such as “Personal Expense Tracker.”

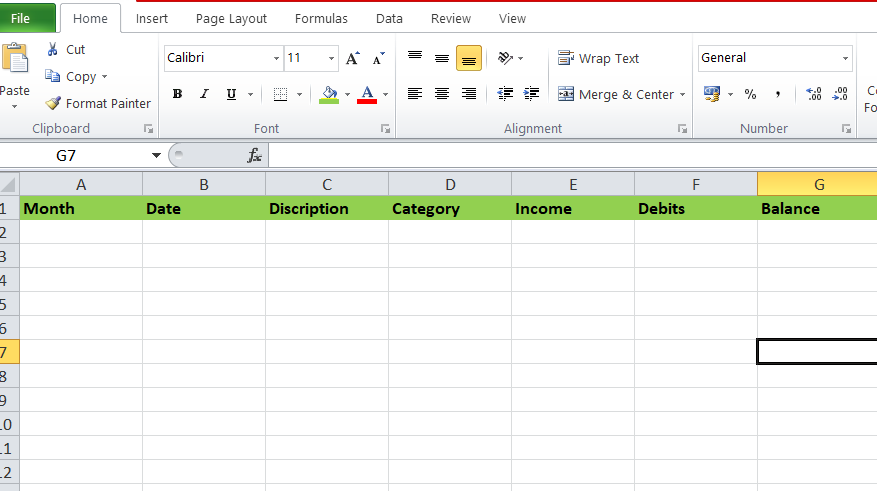
Step 2: Create Columns for Your Data
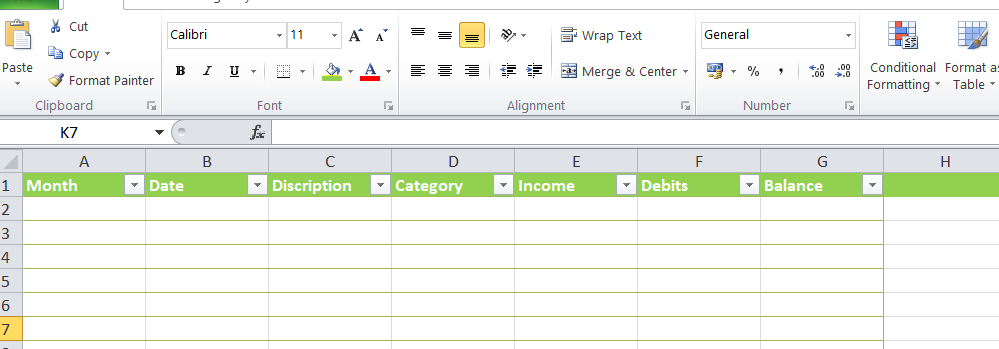
Next, name the columns in your expense tracker. Some common column names/categories are: Month, Date, Description, Category, Income, Debits, and Balance. You can create your own columns based on your requirements.
After that, we’ll convert these columns into tables with alternating rows. For this, we will select all of the columns and then go to the Format as Table style option in the Home tab of Excel and select any of the table formatting views you prefer.
Step 3: Enter Sample Data
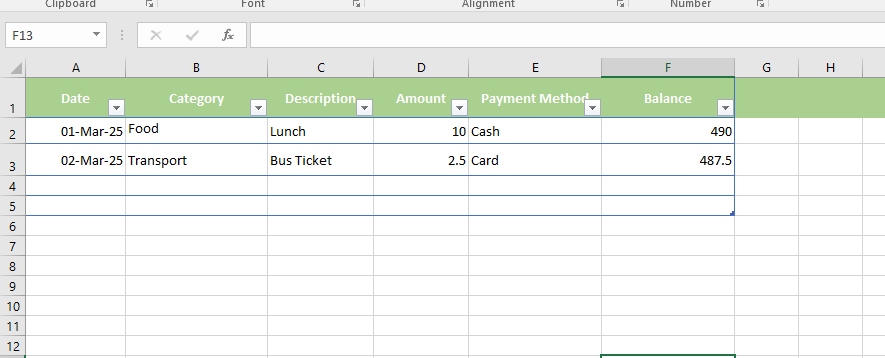
Manually insert a few expenses to test your tracker. For example:
Step 4: Apply Formatting
- Format the date column as Date.
- Format the Amount and Balance columns as currency.
- Select the headers and then click Data > Filter to enable sorting.
Step 5: Use Formulas for Automatic Calculation
Calculate the remaining balance:
- If you’re keeping track of your balance, enter the initial amount in the first row of the Balance column.
- To update the balance, use the following formula:
=E2-D3- Drag the formula down to apply it to every row.
Step 6: Create a Summary Section
To gain insight into your spending, prepare a summary using Excel functions.
- Total Expenses:
=SUM(D2:D100) - Expenses by Category: Use
SUMIF()to calculate category-wise expenses.
=SUMIF(B2:B100, "Food", D2:D100)Step 7: Add a Chart for Visualization
- Select a data range.
- To visualize your spending, go to Insert > Chart and select Pie Chart or Bar Graph.
- Customize it with labels and colors to make it easier to read.
Final Thoughts
Creating an expense tracker in Excel is a quick and efficient approach to managing your finances. Stay on top of your budget and make informed financial decisions by updating your tracker on a regular basis, using calculations, and tracking expense patterns. To further enhance your tracker, consider adding additional features such as conditional formatting or automatic reporting!
💡 Ready to test your Excel knowledge?