

🚀 Don't Miss This Important Resource!
Explore Our Advance Xcel Tools Free !Welcome! In this blog, we’ll learn how to wrap text in Excel. This function can help you keep even longer texts within the boundaries of one cell. Which will make it visible and readable to other users, too. This function is very useful to Excel users even if you are a beginner or a pro.
💡 Ready to test your Excel knowledge?
Before going forward to function, let’s clarify some important things about text wrapping in Excel. That helps you to understand what and why we should learn about the text wrapping function.
What Is Wrap Text in Excel?
Wrap Text in Excel is a formatting option that lets you display long text on multiple lines within a single cell. Instead of spilling over into nearby cells or getting cut off, the content stays neatly contained and fully visible in one place—perfect for keeping your spreadsheet clean and easy to read.
Actually the text wrapping in Excel is important because it helps to maintain readability and prevent text from extending over the visible area. Without this function (text wrap), you have to manually insert line breaks, which can be very time-consuming and make editing or updating the text more difficult.
Why Do We Need Text Wrapping in Excel?
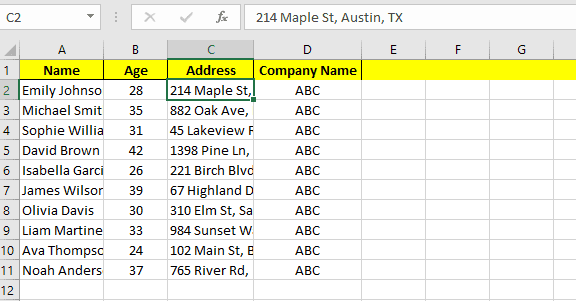
Sometimes, we need to insert a longer text within one cell, and perhaps you’ve noticed that these usually overflow to the next cells. For situations like these, Excel offers a solution in the form of the function “Wrap Text.” Which is literally wraps even longer texts perfectly and beautifully within one cell.
Let’s go forward to learn how to wrap text in Excel.
ALSO READ : How to Find Duplicates in Excel: 4 Easy and Quick Methods
Here are some simple and quick methods to wrap text in Excel.
Method 1: Using the “Wrap Text” Button From Ribbon
This is the easiest way to wrap text in Excel through this function.
Step 1: Select the cell or range of cells you want to format.
Step 2: Then go to the Home tab in the Excel Ribbon.
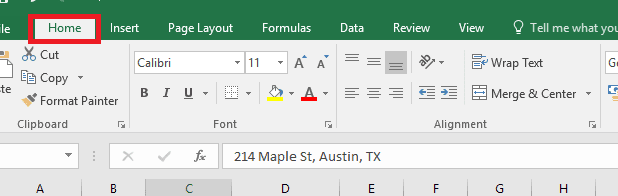
Step 3: Then click on the “Wrap Text” button.
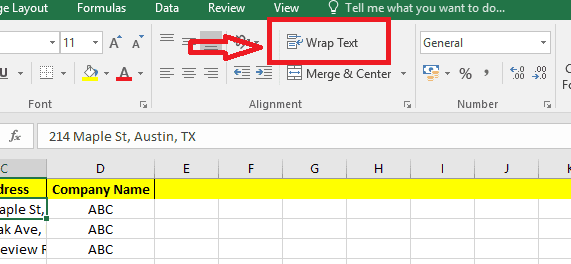
That’s it! Excel will automatically adjust the row height and display all text inside the same cell.
Method 2: Using a keyboard shortcut
This method is faster if you prefer using the keyboard.
Step 1: Select the cell or cells where you want to wrap text.
Step 2: Press Alt, then H, then W.
Method 3: Inserting Manual line Breaks
Use this method if you want to control exactly where the line breaks occur inside a cell.
Step 1: Double-click the cell (or press F2) to enter edit mode.
Step 2: Place your cursor where you want a new line.
Step 3: Press Alt + Enter (Windows) or Option + Command + Enter (Mac).
This is great for formatting addresses or separating items within a single cell.
ALSO READ: How to Use PivotTables in Excel: A Beginner-Friendly Guide
The Bottom Line
Learning how to wrap text in Excel is a simple yet essential skill that enhances the readability and professionalism of your spreadsheets. Whether you’re using the Ribbon for fast access, keyboard shortcuts for efficiency, or manual line breaks for custom formatting, these methods give you full control over how your data is displayed. By understanding how to wrap text in Excel, you ensure that your content remains neat, organized, and easy to read no matter how big your data is.
💡 Ready to test your Excel knowledge?