


In this article you will learn how to create an invoice in Excel with a simple step-by-step guide for both Windows and Mac. You can also get free templates to make the process easier.
For Google Spreadsheets, Google Docs, and Microsoft Word, everything is straightforward. However, things are different when it comes to Microsoft Excel.
With over 1.1 billion users, Microsoft Excel is one of the most popular spreadsheet applications. Excel is an excellent choice for small business owners and individuals looking for a simple and cost-effective way to create invoices.
In this guide, we provide step-by-step instructions on how to create an Excel invoice from scratch, add essential invoice components, use formulas to automatically calculate line items and totals, save invoices as PDFs, and much more.
RELATED: How to Make Cells Bigger in Excel — 6 Methods That Actually Work
Here are 2 Simple Method to create an Invoice in Excel
Method 1: Using Excel Templates (Windows + Mac)
Having a pre-made template makes it quick and easy to create a professional-looking Excel invoice that’s clear and easy to understand. Simply open Microsoft Excel on your Mac or Windows device, choose your preferred invoice template, customize it to match your brand, and your Excel invoice will be ready in minutes.
7 easy steps to create a professional invoice with an Excel invoice template.
Step 1: Open the Microsoft Excel program
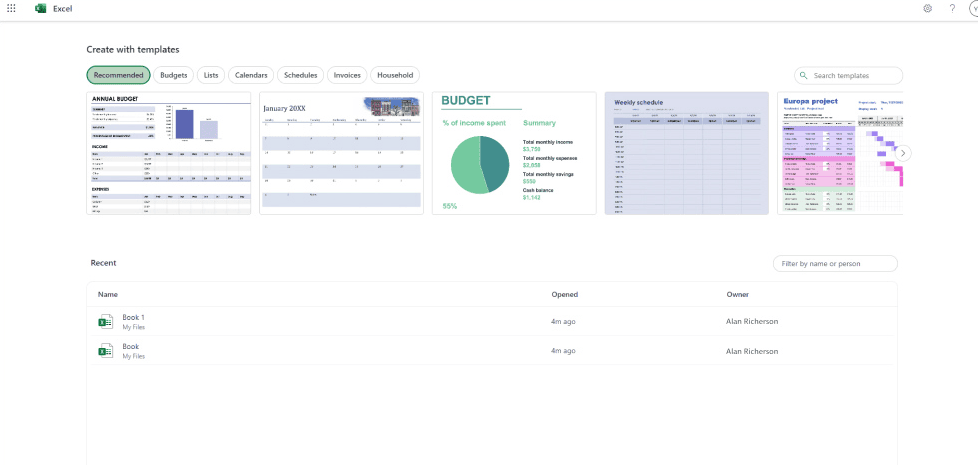
To create a free Excel invoice template for purchase orders, launch the Excel application on your PC or Mac.
Step 2: Search for the appropriate templates
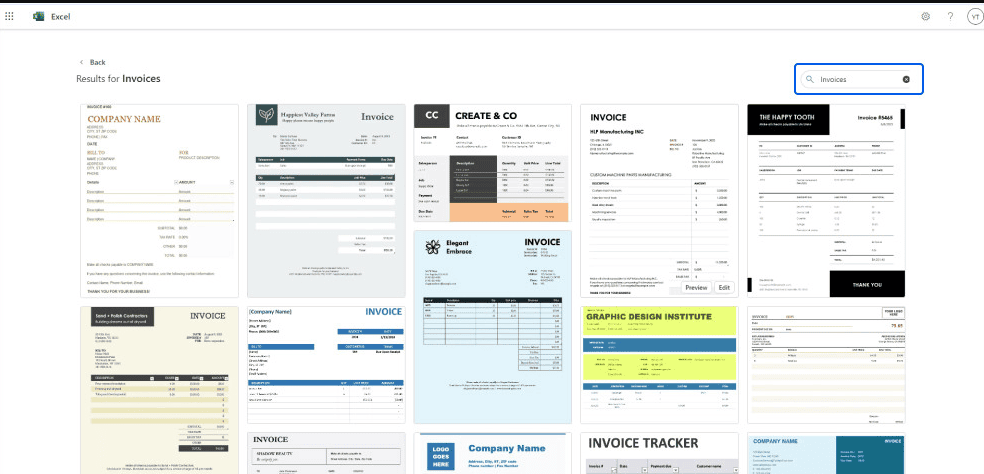
When you open Microsoft Excel on your device, look for invoice templates near the top of the window. To quickly find the right option, type “invoice” into the search bar to browse Excel invoice templates. Before searching, make sure your computer or laptop is connected to the internet.
Step 3: Select your preferred template
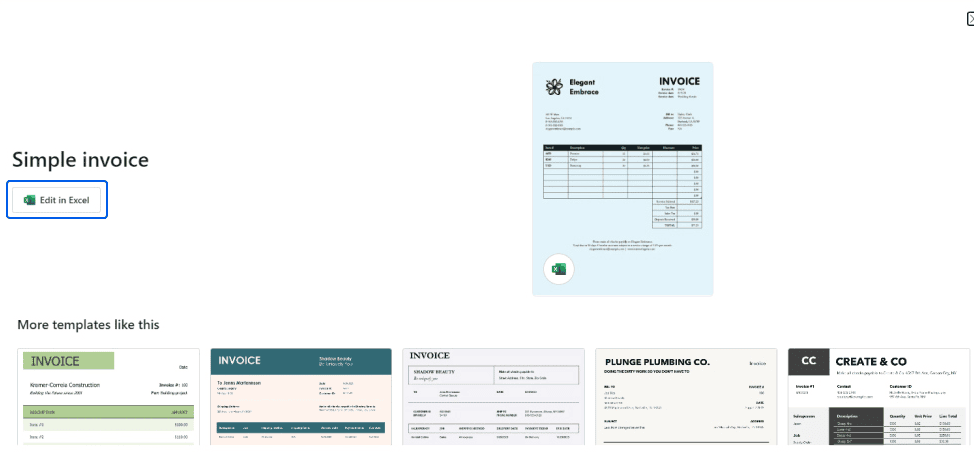
After browsing the available Excel invoice templates, choose one that best fits your business needs. Microsoft Excel offers a wide variety of invoice templates, making it easy to find the right option.
You’ll find blank invoice templates for shipping, services, sales, and other business categories.
Select the Excel invoice template that best suits your company’s invoicing requirements, download it, and then open the template to start customizing your invoice.
Step 4: Open the template
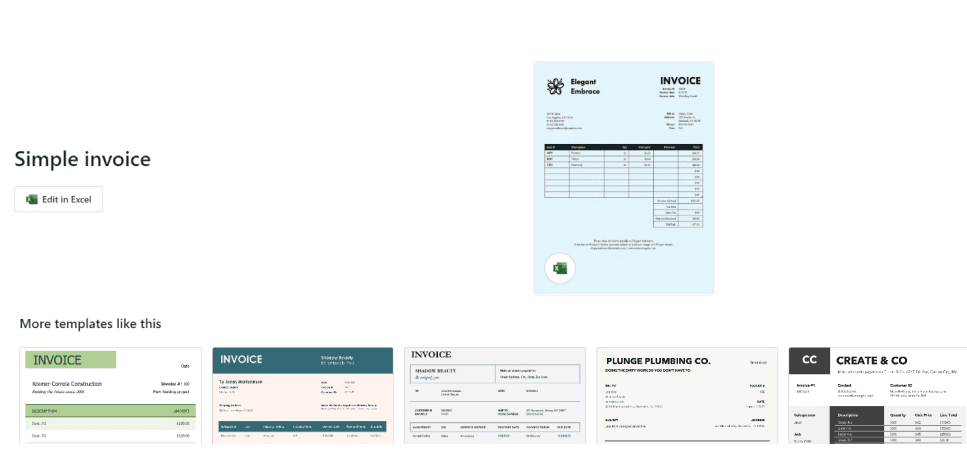
Once you’ve selected your free Excel invoice template, preview it and click Create to open or download the blank invoice template. The template will then launch in a new window, ready for you to customize.
Step 5: Personalize the invoice
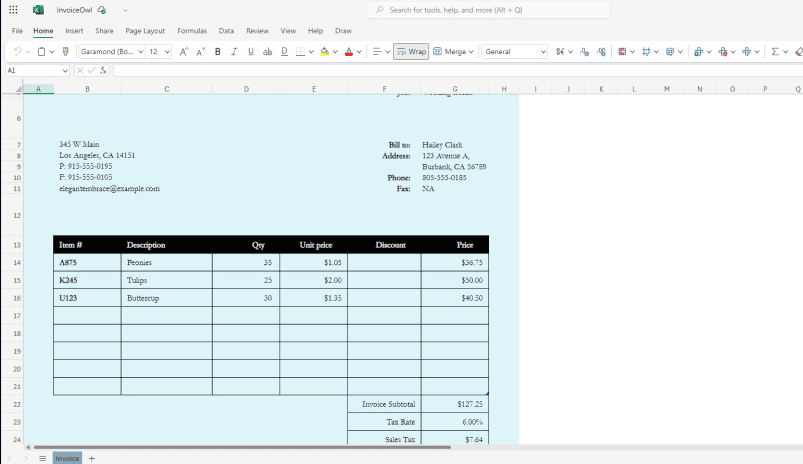
Once you’ve chosen a simple invoice template, open it in a new spreadsheet and begin customizing it to match your business.
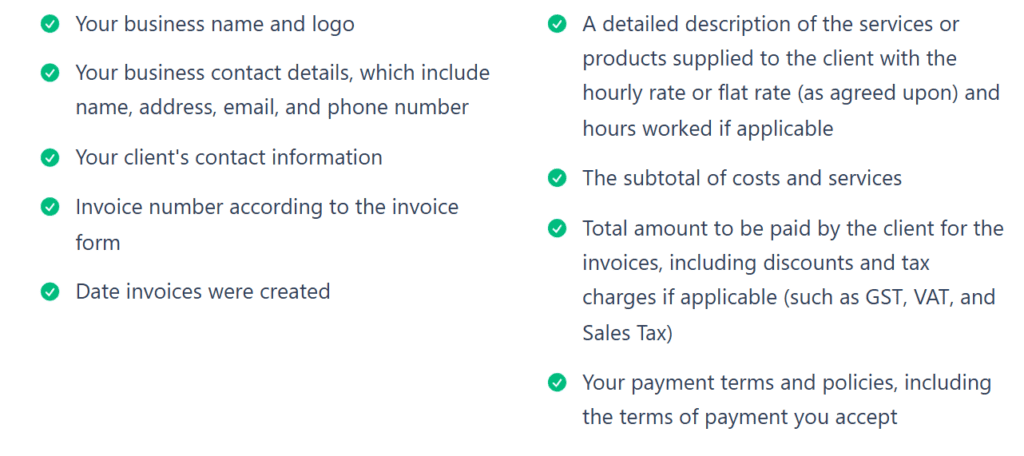
Your simple invoice template should include all the essential invoice details your client needs to review and make a timely payment.
Your billing statement must contain
Step 6: Save the invoice
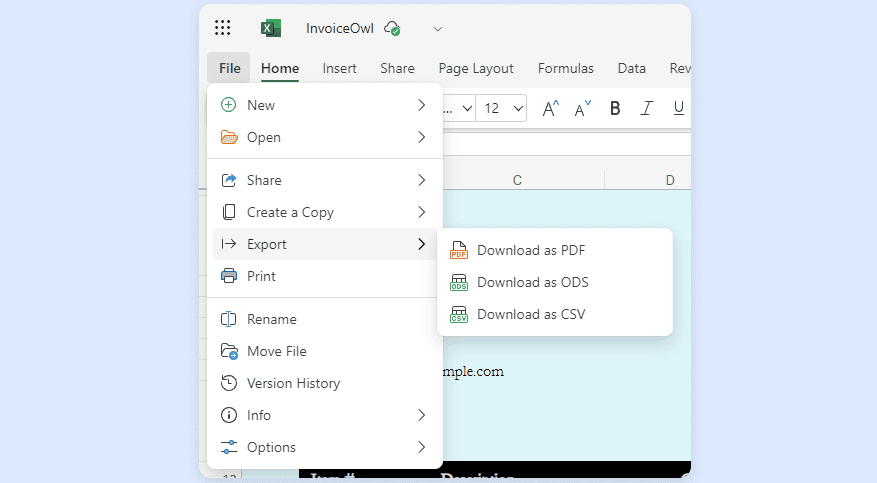
After you’ve completed the free invoice template or invoice form with all the required billing details for your project, save a draft as an Excel spreadsheet on your Windows PC or Mac. You can also use free invoicing software for Mac to simplify the process while improving accuracy and efficiency.
It’s best to save the file as an .XLS or . XLSX document so you can edit it later if needed.
Before sending the invoice to your customer, save it as a PDF to preserve the formatting and prevent others from editing the document.
Step 7: Send the invoice
Send invoices to your customers via email, or print hard copies and mail them for free. Don’t forget to include friendly notes that will impress the client.
ALSO READ: Quick Access Toolbar in Excel (QAT) — Complete Guide to Use & Customize
Method 2: Create Your Own Invoice Template in Excel
Follow this detailed tutorial if you want to go above and beyond and create your own Excel invoice template by hand:
Step 1: Open a New Blank Workbook
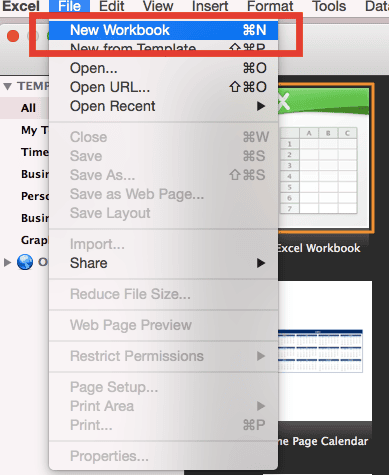
In Excel, select File and then New Workbook to open a new blank workbook. If Excel opens a blank spreadsheet when you enter it, you can skip this step.
Step 2: Remove Gridlines
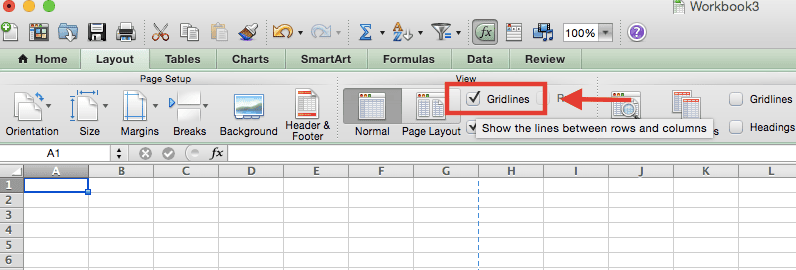
You can work with a cleaner sheet by removing gridlines, but this step is optional.
After you’ve finished creating the invoice, you can either leave the gridlines in place or change the format.
To do this, select the Layout menu and uncheck the Gridlines box in the View section.
Step 3: Create an Invoice Header
An invoice header’s elements include the following:
- The word “Invoice”
- Business name and contact details, including phone number, fax, email, city, and street address
- Your company’s logo, if you have one
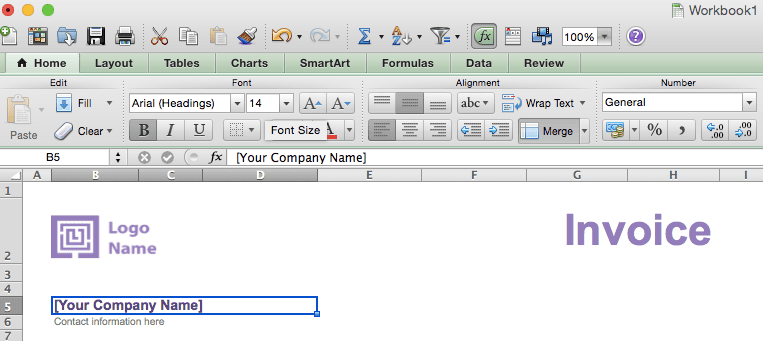
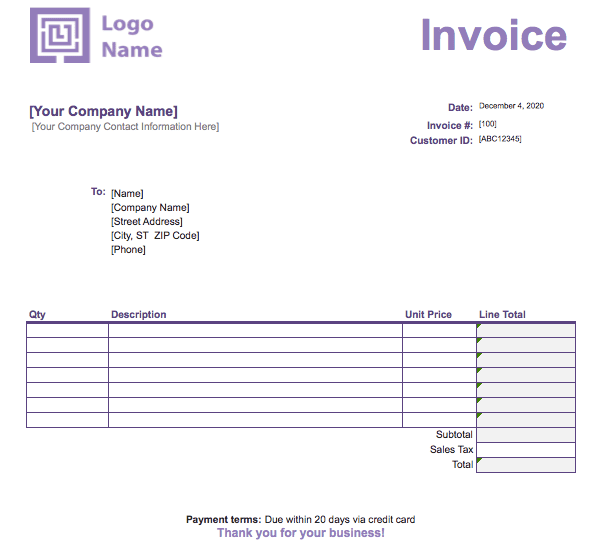
As shown in the example below, enter all of these details on the sheet and customize the font, color, and font size according to your preference.
Step 4: Add Invoice Payment Due Date & Invoice Number
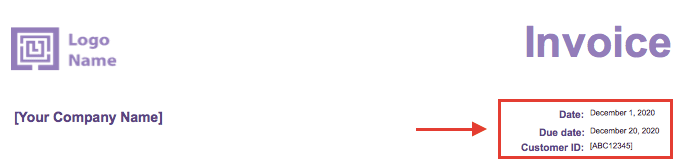
Write the billing date, the payment deadline, and the unique invoice number on three separate lines on the right side of the header.
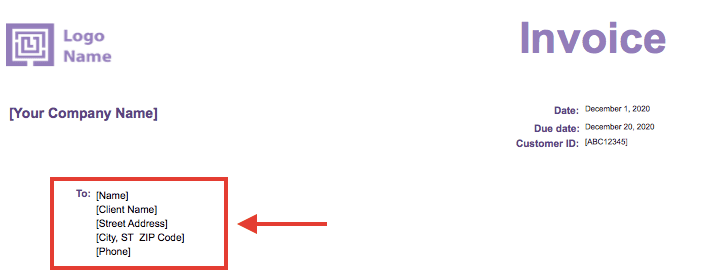
Step 5: Enter the Client’s Contact Information
The client’s name, street address, city, and phone number are all included in their contact information.
Begin this section with “Invoice To” or simply “To,” then enter all of the client’s contact details.
Step 6: Create an Itemized List of Services and Products
A detailed list of products and services should include:
- Product name and description
- Cost per unit
- Quantity purchased
- Taxes and discounts
- Subtotal for each product line
- Total amount owed
The easiest way to create this list is by adding a table with a column and row for each element.
To do this, go to Tables and select New.
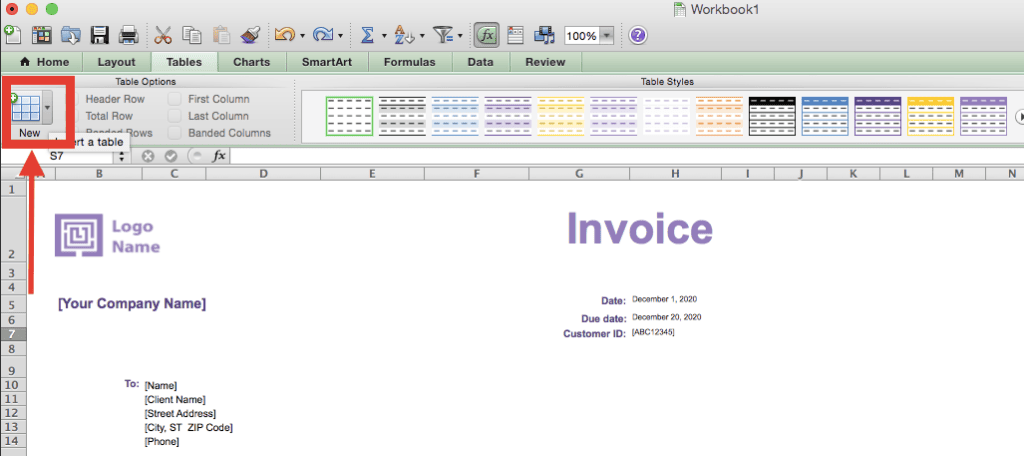
Next, use the Table Styles feature in the upper-left corner of the Table menu to customize the table colors to match your preferred color scheme.
Once you’ve selected a design, fill in the table with the relevant sales information.
By this point, your invoice should resemble the example below.
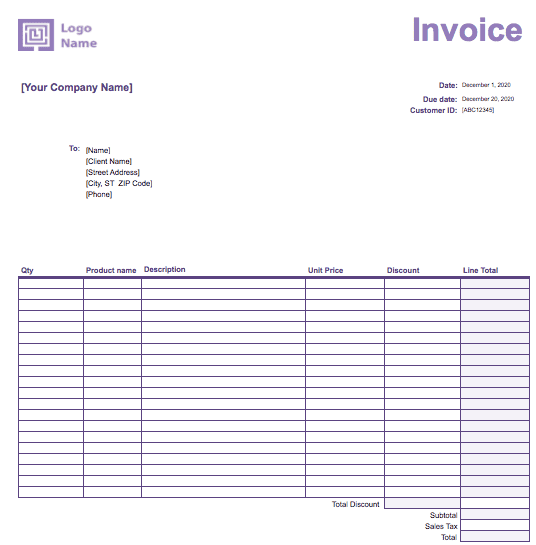
Remember, these are the standard components of a typical sales invoice.
Depending on the client, industry, and the products or services you are selling, your invoice may need to include additional information.
Step 7: Use the SUM Function to Calculate the total.
You can add a SUM function to your worksheet to automatically calculate totals, making math calculations easier.
For example, suppose you want to calculate the subtotal of the line totals shown in the example below.
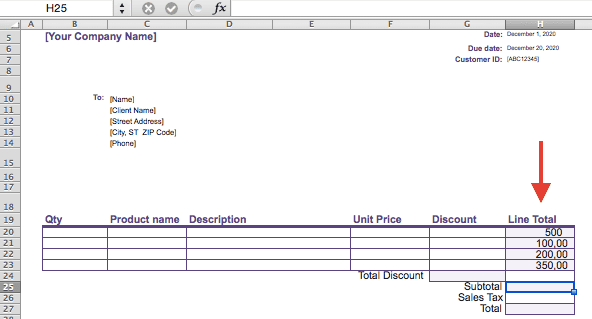
In the Formula Builder, located next to the fx symbol at the top of the page, simply enter the SUM formula.
In this example, we want to calculate the total of the line totals in cells H20 through H23. Therefore, the formula is =SUM(H20:H23).
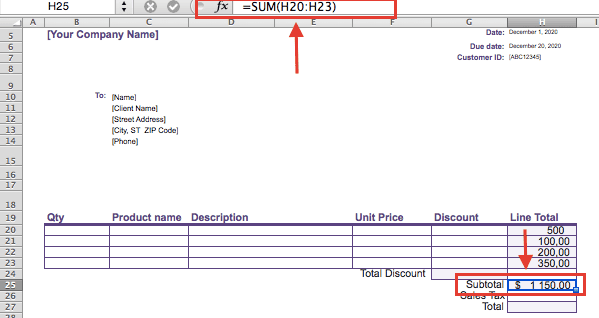
To automatically add up your tax and the final total, repeat these steps.
Step 8: Add any further notes and the terms of payment.
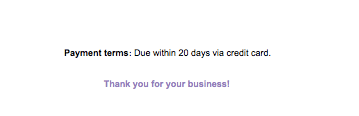
Put your payment terms and a brief “thank you” note at the bottom of the invoice.
Step 9: Save and submit your completed invoice
Use the previously described steps to save the completed invoice as a PDF file.
After that, send the PDF invoice to your client using their preferred method of communication, and you’re ready to get paid!
Key Takeaways
And that’s all! We hope you enjoyed our guide to creating invoices in Excel.
Here’s a quick summary of the key topics we covered:
If you want to create an Excel invoice using a template, follow these steps:
- Find and select an invoice template.
- Enter the purchase details and customize the template to suit your needs.
- Save the completed invoice and send it via email, fax, or invoicing software.
If you want to create an Excel invoice from scratch, follow these steps:
- Open a new, blank worksheet.
- Remove the gridlines (optional).
- Create a header with your business details and logo.
- Add the invoice number, issue date, and payment due date.
- Enter the client’s name and contact information.
- Create a list of the products or services and calculate the invoice total.
- Use Excel’s
SUMfunction to automatically calculate the total. - Include any additional notes and payment terms.
- Save the completed invoice and send it to your client.