


If you’ve ever opened a spreadsheet and watched your text spill awkwardly into the next column, you already know why cell size matters. Excel’s default cell dimensions are fine for short numbers and labels, but the moment you add longer text, dates, or wrapped content, things start to look messy.
The good news is that Excel gives you more than one way to fix this. Some methods are quick and rough, others let you nail down an exact pixel size, and a couple of them don’t even change the cell size at all — they just make things look bigger. Below, I’ll walk through six approaches I actually use, depending on what I’m trying to fix.
Method 1: Resize Rows and Columns Directly
This is the most straightforward fix — you grab the edge of a column or row and make it bigger. There are two ways to do this: dragging with your mouse, or typing in an exact value through a dialog box.
Resizing with Your Mouse
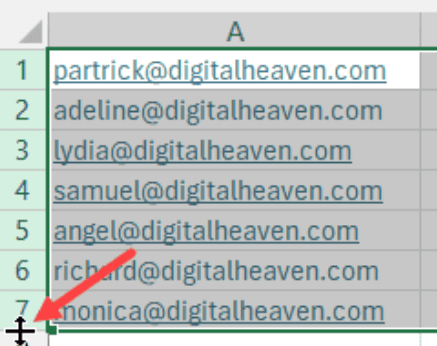
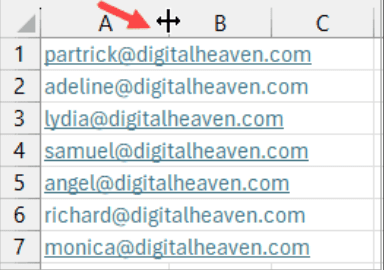
To widen a column, hover your cursor right on the line between two column letters — say, between A and B. You’ll know you’re in the right spot when the cursor turns into a black double-headed arrow.


Click and hold, then drag to the right until the column looks the width you want.
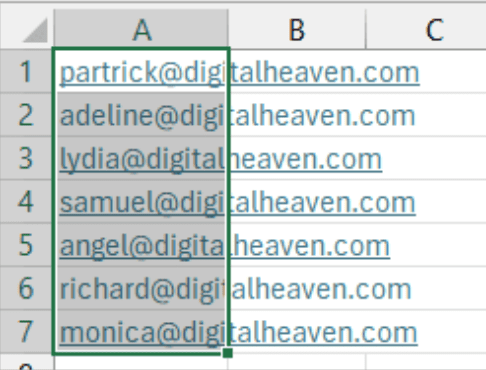
Rows work the same way, just vertically. If you want several rows the same height, select them first — click row 1’s header, then hold Shift and click row 7’s header to grab everything in between.

Once your rows are selected, hover over the bottom edge of any selected row header until you see that same double-arrow cursor, then drag down.
⚠️ Worth knowing: Dragging with the mouse is fast, but it’s almost impossible to land on an exact pixel value this way. If precision matters — say, you’re matching a printed template — use the dialog box method instead.
Resizing with the Column Width / Row Height Dialog Box
When you need an exact size, skip the mouse and go straight to the dialog boxes.
- Right-click the column header and choose Column Width from the menu.

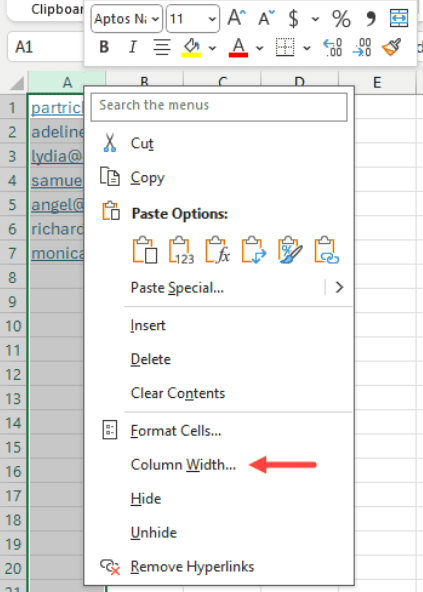
- Type in the width you want and click OK.

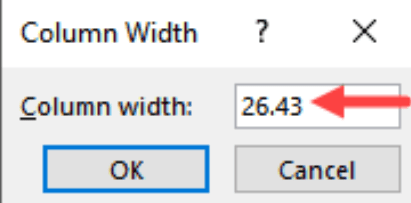
- The column updates immediately to match the number you entered.
Row height works the same way:
- Select your rows.
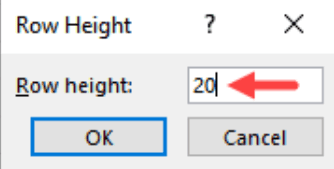
- Right-click and choose Row Height.

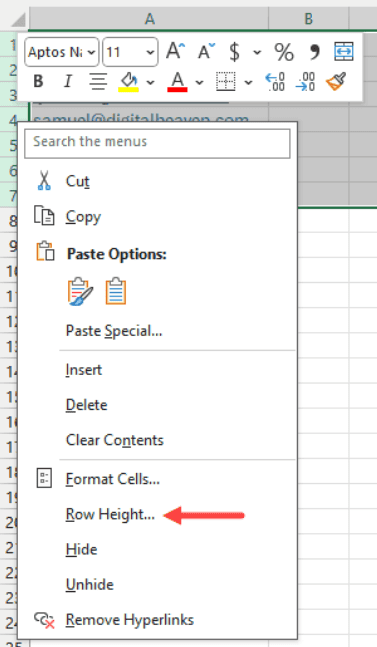
- Type the height you want in the box and click OK.

ALSO READ: Quick Access Toolbar in Excel (QAT) — Complete Guide to Use & Customize
Method 2: Use the AutoFit Feature to Enlarge Cells
If you don’t care about hitting an exact number and just want the cell to fit whatever’s inside it, AutoFit is the easier option. It looks at the content in a column or row and resizes it automatically — no guessing required.
Using AutoFit from the Ribbon
- Select the cells you want to resize.

2. Go to Home → Format (in the Cells group).

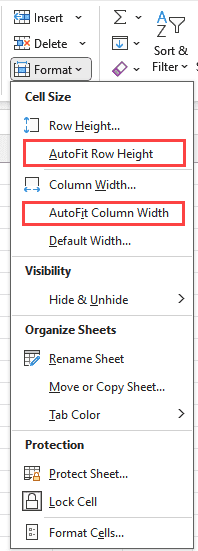
3. Choose AutoFit Row Height or AutoFit Column Width.
Keyboard Shortcuts
- Alt, H, O, A → AutoFit Row Height
- Alt, H, O, I → AutoFit Column Width
These aren’t pressed all at once — tap Alt, release, then H, release, and so on through the sequence.
The Double-Click Shortcut
There’s an even faster way if you’re just resizing one column or row at a time.
- Hover over the column border until you see the resize cursor.
- Double-click instead of dragging.

Excel instantly resizes the column to fit its widest piece of content. If the content is shorter than the current width, the column will actually shrink — AutoFit goes both ways.
The same double-click trick works on row boundaries too.
Method 3: Wrap Text Instead of Widening the Column
Sometimes widening a column isn’t practical — maybe you’ve already got a tight layout and don’t want to push other columns off the screen.
In that case, Word Wrap is a better fix. Instead of making the cell wider, it lets the text wrap onto multiple lines and grows the row height to match.
- Select the cell (or cells) with the overflowing text.
- Go to Home → Wrap Text in the Alignment group.
Keyboard Shortcut
Alt, H, W → Wrap Text
The text immediately breaks into multiple lines to fit the column width, and the row grows taller automatically so nothing gets cut off.
💡 When to use this: Word Wrap is ideal for things like comments, notes, or descriptions where the text length varies a lot from row to row. It keeps your column widths consistent while still showing everything.
Method 4: Merge Cells to Create One Bigger Block
If you need a single larger cell — usually for a heading that spans several columns — merging is the way to go.
Excel actually gives you three slightly different merge options.
| Option | What It Does |
|---|---|
| Merge & Center | Combines the selected cells into one and centers the content inside it. |
| Merge Across | Merges each row of the selection separately, keeping the original text alignment. |
| Merge Cells | Combines the cells into one without centering anything. |
⚠️ Be careful with this one: Merging cells can quietly cause problems down the line — sorting and filtering get awkward, and if you merge cells that already have data in more than one of them, Excel keeps only the top-left value and throws the rest away. I’d stick to merging for headings and titles, not for general data.
Example
Say you’ve got a heading in A1 and you want it centered across columns A, B, and C.
- Select cells A1, B1, and C1.
- Click Home → Merge dropdown → Merge & Center.
The three cells become one, and the heading sits centered across the whole space.
Method 5: Build a Template with Bigger Cells Already Set
If you find yourself resizing the same cells every time you start a new workbook, save yourself the repetition and build a template instead.
- Open a new, blank workbook.
- Select the whole worksheet.
- Click the small triangle above row 1 and to the left of column A.
- Or press Ctrl + A.
- Resize your columns and rows the way you want.
- Set any additional defaults such as:
- Font
- Page layout
- Header/footer
- Go to File → Save As.
- In the Save as type dropdown, choose Excel Template (*.xltx).
- Give it a clear name and click Save.
Using Your Template Later
- Open Excel and click New.
- Click the Personal tab.
- Select your saved template.
Your new workbook opens with the same column widths and row heights you set up earlier.
Method 6: Make Cells Look Bigger Without Resizing Them
Not every fix needs to change the actual cell dimensions.
Sometimes the goal is just to make things easier to read or visually centered.
Center Across Selection (Without Merging)
This does almost the same visual job as Merge & Center, but without actually merging anything.
The cells stay independent, but the text appears centered across all of them.
Steps
- Select the cells you want the text centered across (for example, A1).
- Right-click and choose Format Cells (or press Ctrl + 1).
- Open the Alignment tab.
- Open the Horizontal dropdown.
- Select Center Across Selection.
- Click OK.
The heading now appears centered across the selected cells while keeping each cell separate.
Just Increase the Font Size
Sometimes the real problem isn’t the cell — it’s that the text inside it is too small to read comfortably.
- Select your data.
- Go to Home → Font Size.
- Choose a larger size.
Zoom In on the Worksheet
If you’re not trying to change the file at all, zooming in is the way to go.
It scales everything visually without altering a single cell dimension.
The Zoom Slider
Located in the bottom-right corner of the Excel window.
- Drag the slider to zoom in or out.
- Use the + and – buttons to adjust by 10%.
The Zoom Dialog Box
- Go to View → Zoom.
- Or click the percentage number next to the slider.
- Pick a preset percentage or enter your own custom value.
- Click OK.
Zoom to Selection
- Select the range you want to focus on.
- Go to View → Zoom to Selection.
Ctrl + Scroll Wheel
This is often the fastest method.
- Ctrl + Scroll Up → Zoom in
- Ctrl + Scroll Down → Zoom out
Which Method Should You Actually Use?
| Situation | Best Method | Why |
| A few cells overflow | AutoFit (double-click) | Instant, no typing needed |
| Need an exact size | Column Width / Row Height dialog | Lets you set a precise number |
| Text length varies a lot | Word Wrap | Adapts automatically per row |
| Need a heading to span columns | Merge & Center | Purpose-built for this |
| Don’t want to break sorting | Center Across Selection | Looks merged, isn’t actually merged |
| Resizing the same way every time | Save as a template | Set it once, reuse forever |
| Just hard to read on screen | Zoom (Ctrl + Scroll) | Doesn’t touch the file at all |
RELATED: How to Strikethrough Text in Excel — 4 Quick Methods
Common Questions
What’s the fastest way to make a column bigger in Excel?
Double-clicking the right edge of the column header is the quickest method — Excel automatically widens the column to fit whatever’s inside it. No dragging, no dialog boxes.
Why does my column shrink when I use AutoFit?
AutoFit adjusts the column to match its content exactly, in both directions. If your content is shorter than the current width, AutoFit will shrink the column down to fit — it’s not a one-way enlargement tool.
Is merging cells a good way to make them bigger?
It works, but it comes with trade-offs. Merged cells can interfere with sorting, filtering, and even copy-pasting later on. It’s generally fine for headings and titles, but I’d avoid merging cells that hold actual data you plan to work with.
Can I make cells bigger without changing the column width?
Yes — Word Wrap, Center Across Selection, increasing font size, and zooming in are all ways to improve readability or layout without touching the actual column width or row height.
How do I make every new workbook start with bigger cells?
Set up your preferred row heights and column widths once, then save the file as an Excel Template (*.xltx). Any workbook you create from that template afterward will already have those dimensions in place.
Wrapping Up
There’s no single “correct” way to make cells bigger in Excel — it really depends on what you’re trying to fix. If it’s a one-off overflow issue, AutoFit or a quick double-click will sort it out in seconds. If you’re building something more polished, like a report or template, you’ll probably want the precision of the dialog boxes or the consistency of a saved template.
And if the real issue is just that you’re squinting at your screen, skip resizing altogether and zoom in instead — sometimes the simplest fix is the right one.