


Sorting data in Excel is a simple but effective method to organize your information so that it’s easier to look at and understand. If you know how to sort data in Excel, you will easily find what you need, whether you’re dealing with a small dataset or a massive table.
💡 Ready to test your Excel knowledge?
In this article you learn how to sort a single column in Excel and how to sort multiple columns in Excel for more complicated datasets.
We’ll also talk about how to use a custom sort in Excel so that you may put your data in the order you want.
What Does Sorting Mean in Excel?
Sorting in Excel is used to arrange data in a certain order. You can sort number-based data either from smallest to largest or from largest to smallest. If you have text values, you can use SORT in Excel to arrange them from A to Z or Z to A. You can also sort information in a way that fits your needs.
For Example:
- Arranging names in order from A to Z
- Arranging numbers in order from smallest to largest
- Arranging dates in order from oldest to newest
- Arranging sales data in order from highest to lowest
Sorting is generally the first thing you do before filtering, analyzing, or making charts.
ALSO READ: How to Use XLOOKUP in Excel
How to Sort a Single Column in Excel
It’s easy to sort a single column in Excel. This allows you to arrange data in either ascending order or descending order according to the values in that column.
Here is the step-by-Step Method:
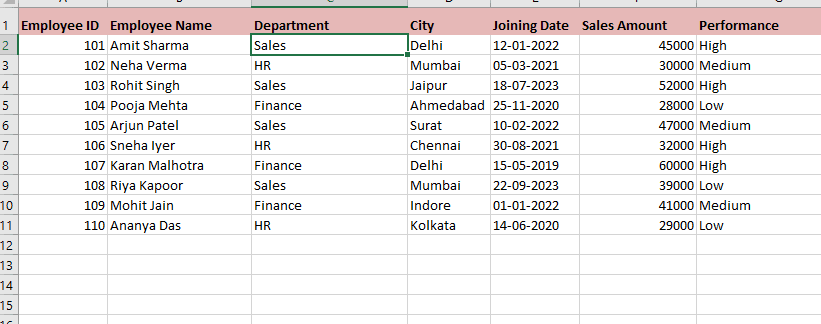
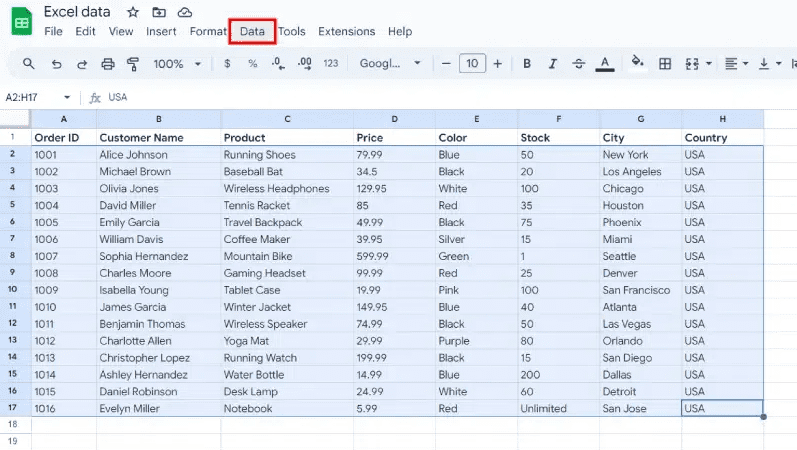
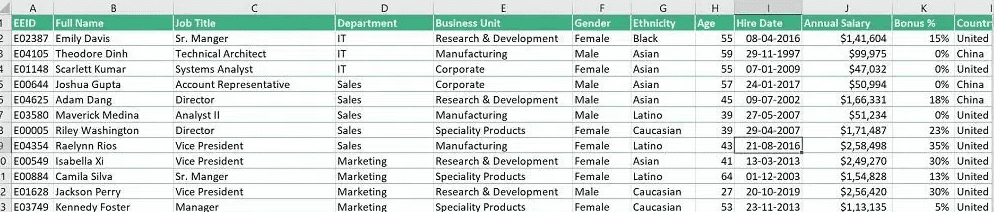
STEP 1: Select any cell in the column you want to sort
In this I want to sort the data of the department from A to Z. So I selected a cell of the department column.

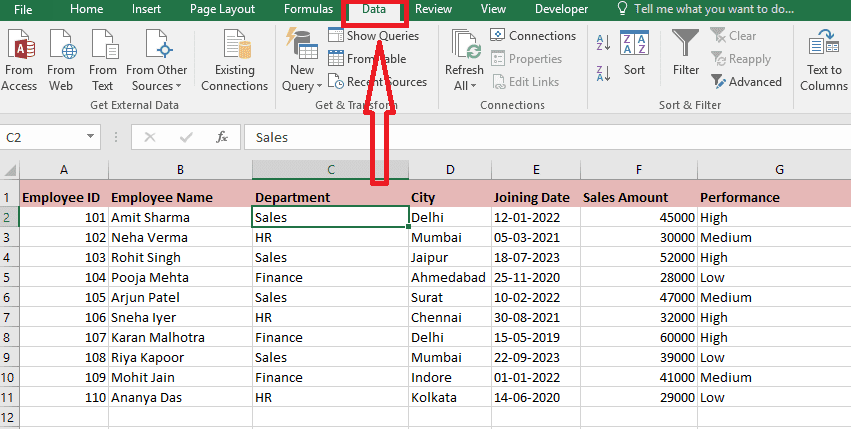
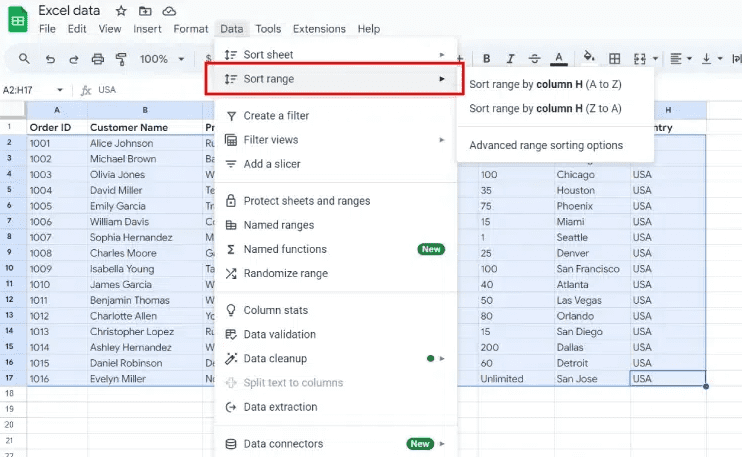
STEP 2: Go to the Data tab on the Ribbon

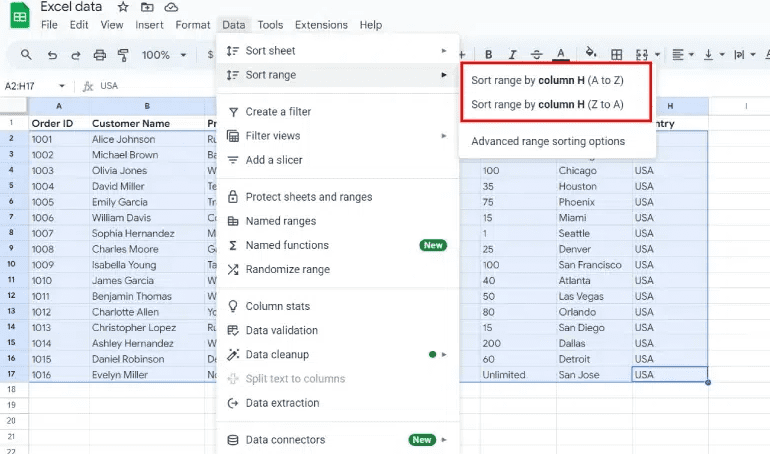
STEP 3: In the Sort & Filter group, select any of these:
- Sort A to Z (ascending order)
- Sort Z to A (descending order)

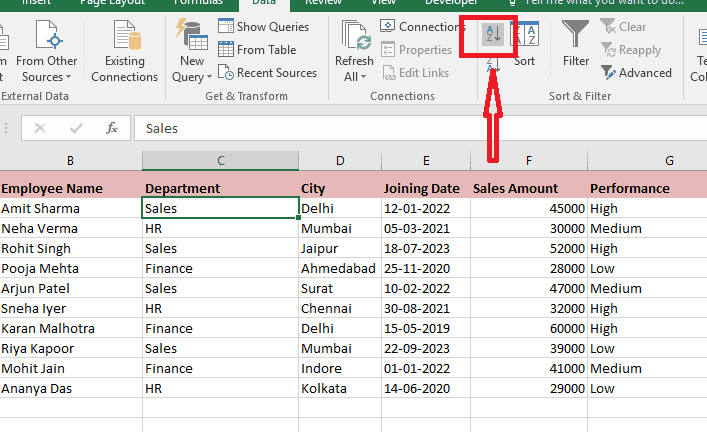
In my case I want it in ascending order, so I selected “A to Z.” After that, Excel will automatically sort the entire table.


How to Sort Multiple Columns in Excel
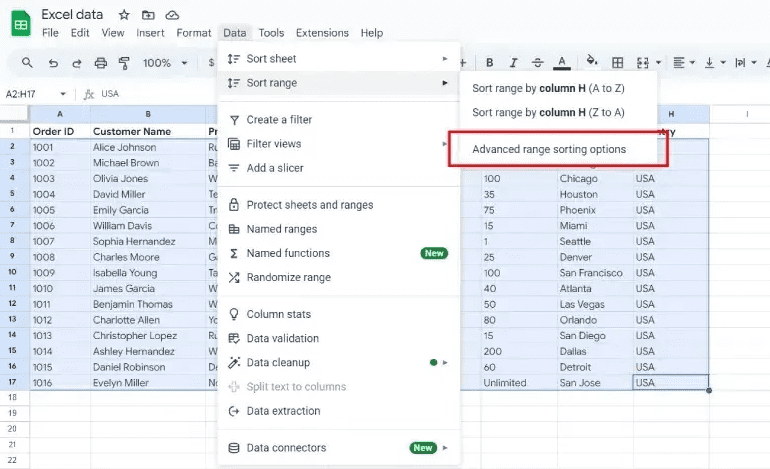
Mostly, you only need to sort one column. But sometimes you need to sort across multiple columns at once. Advanced sorting methods let you sort data by more than one column. The following is the step-by-step guide:
STEP 1: Select your whole data
You can click anywhere in the range of data you want to sort. Select the whole table, including the header row if possible.

Step 2: Go to the Data tab
On the Excel ribbon, click on the “Data” tab.

Step 3: Click Sort in the ‘Data tab’
Find the “Sort” button in the “Data Tab” group and click it.

Step 4: Choose the first sort column
A “Sort” dialog box will be shown. Choose the first column you want to sort by from the “Sort by” dropdown menu. This is the main thing you need to sort by.

Step 5: Add additional sorting levels (it’s optional)
To sort by more than one column, click the “Add Level” button. Next, from the new “Then by” dropdown menu, select the next column you want to sort by and choose whether you want it to go ascending (up) or descending (down). You may repeat this step to sort by a third level.

Step 6: Then click ‘OK’
Once you’ve set your sorting rules, click “OK” to start the sort.


ALSO READ: How to Pin a Row in Excel
How to Apply a Custom Sort in Excel
You can use custom sorting in Excel to create your own order. There may be times when you need to sort data that cannot be arranged alphabetically or in ascending order. Excel allows you to create custom lists to help you sort data.
For example, assume you want to sort the dataset by department in the order of IT, Sales, and Marketing. For your reference, please follow the steps below:
- Choose the dataset > In the Data tab, click on the Sort button.
- Pick the Department column to sort
- Choose Cell Values under Sort On.
- Pick the Custom List from the Order drop-down menu.
- In the Custom Lists dialog box, put the List entries in a row, with commas between them. For example, IT, Sales, Marketing
- Click on Add > Click OK.

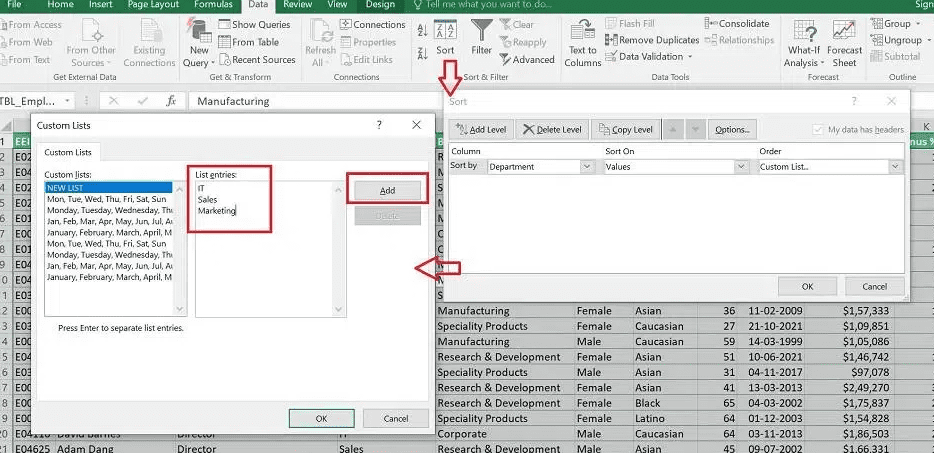
Below is the result of the same.

How to Sort by Date in Excel
Knowing how to sort dates in Excel can help you analyze data more quickly and avoid making expensive mistakes, whether you’re working with invoices, attendance records, project timelines, or sales reports.
Below is the step-by-step guide to sorting dates in Excel:
You can sort dates by:
- Newest to Oldest
- Oldest to Newest
STEP 1: First Click a date cell


STEP 2: Go to the Data tab from the Ribbon.

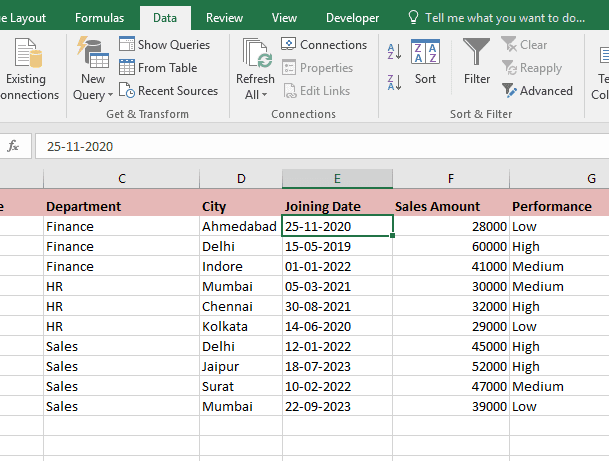
STEP 3: Choose the desired date sorting option
Make sure that your dates are in the right format and not just text.
How to Sort Data in Excel the Right Way
- Always make a copy of your data before sorting it.
- Use Excel tables to sort things more safely and automatically.
- Make sure your data is clean and consistent.
- Use custom sorts to put things in an order that makes sense.
- For more advanced analysis, use filters and sorting together.
Final Thought
Sorting data in Excel is a simple but useful skill that can make a big difference in how you organize and view information. Excel offers multiple ways to sort data, from simple alphabetical sorting to advanced multi-column sorting and custom sorting. It can handle datasets of any size.
If you learn how to sort data in Excel, you can save time, reduce errors, and present information clearly and professionally. Sorting is a basic Excel skill that is useful in many situations, whether you are a student, office worker, analyst, or business owner.
💡 Ready to test your Excel knowledge?